Dzien 4 - Tinkercard i kolorowe diody

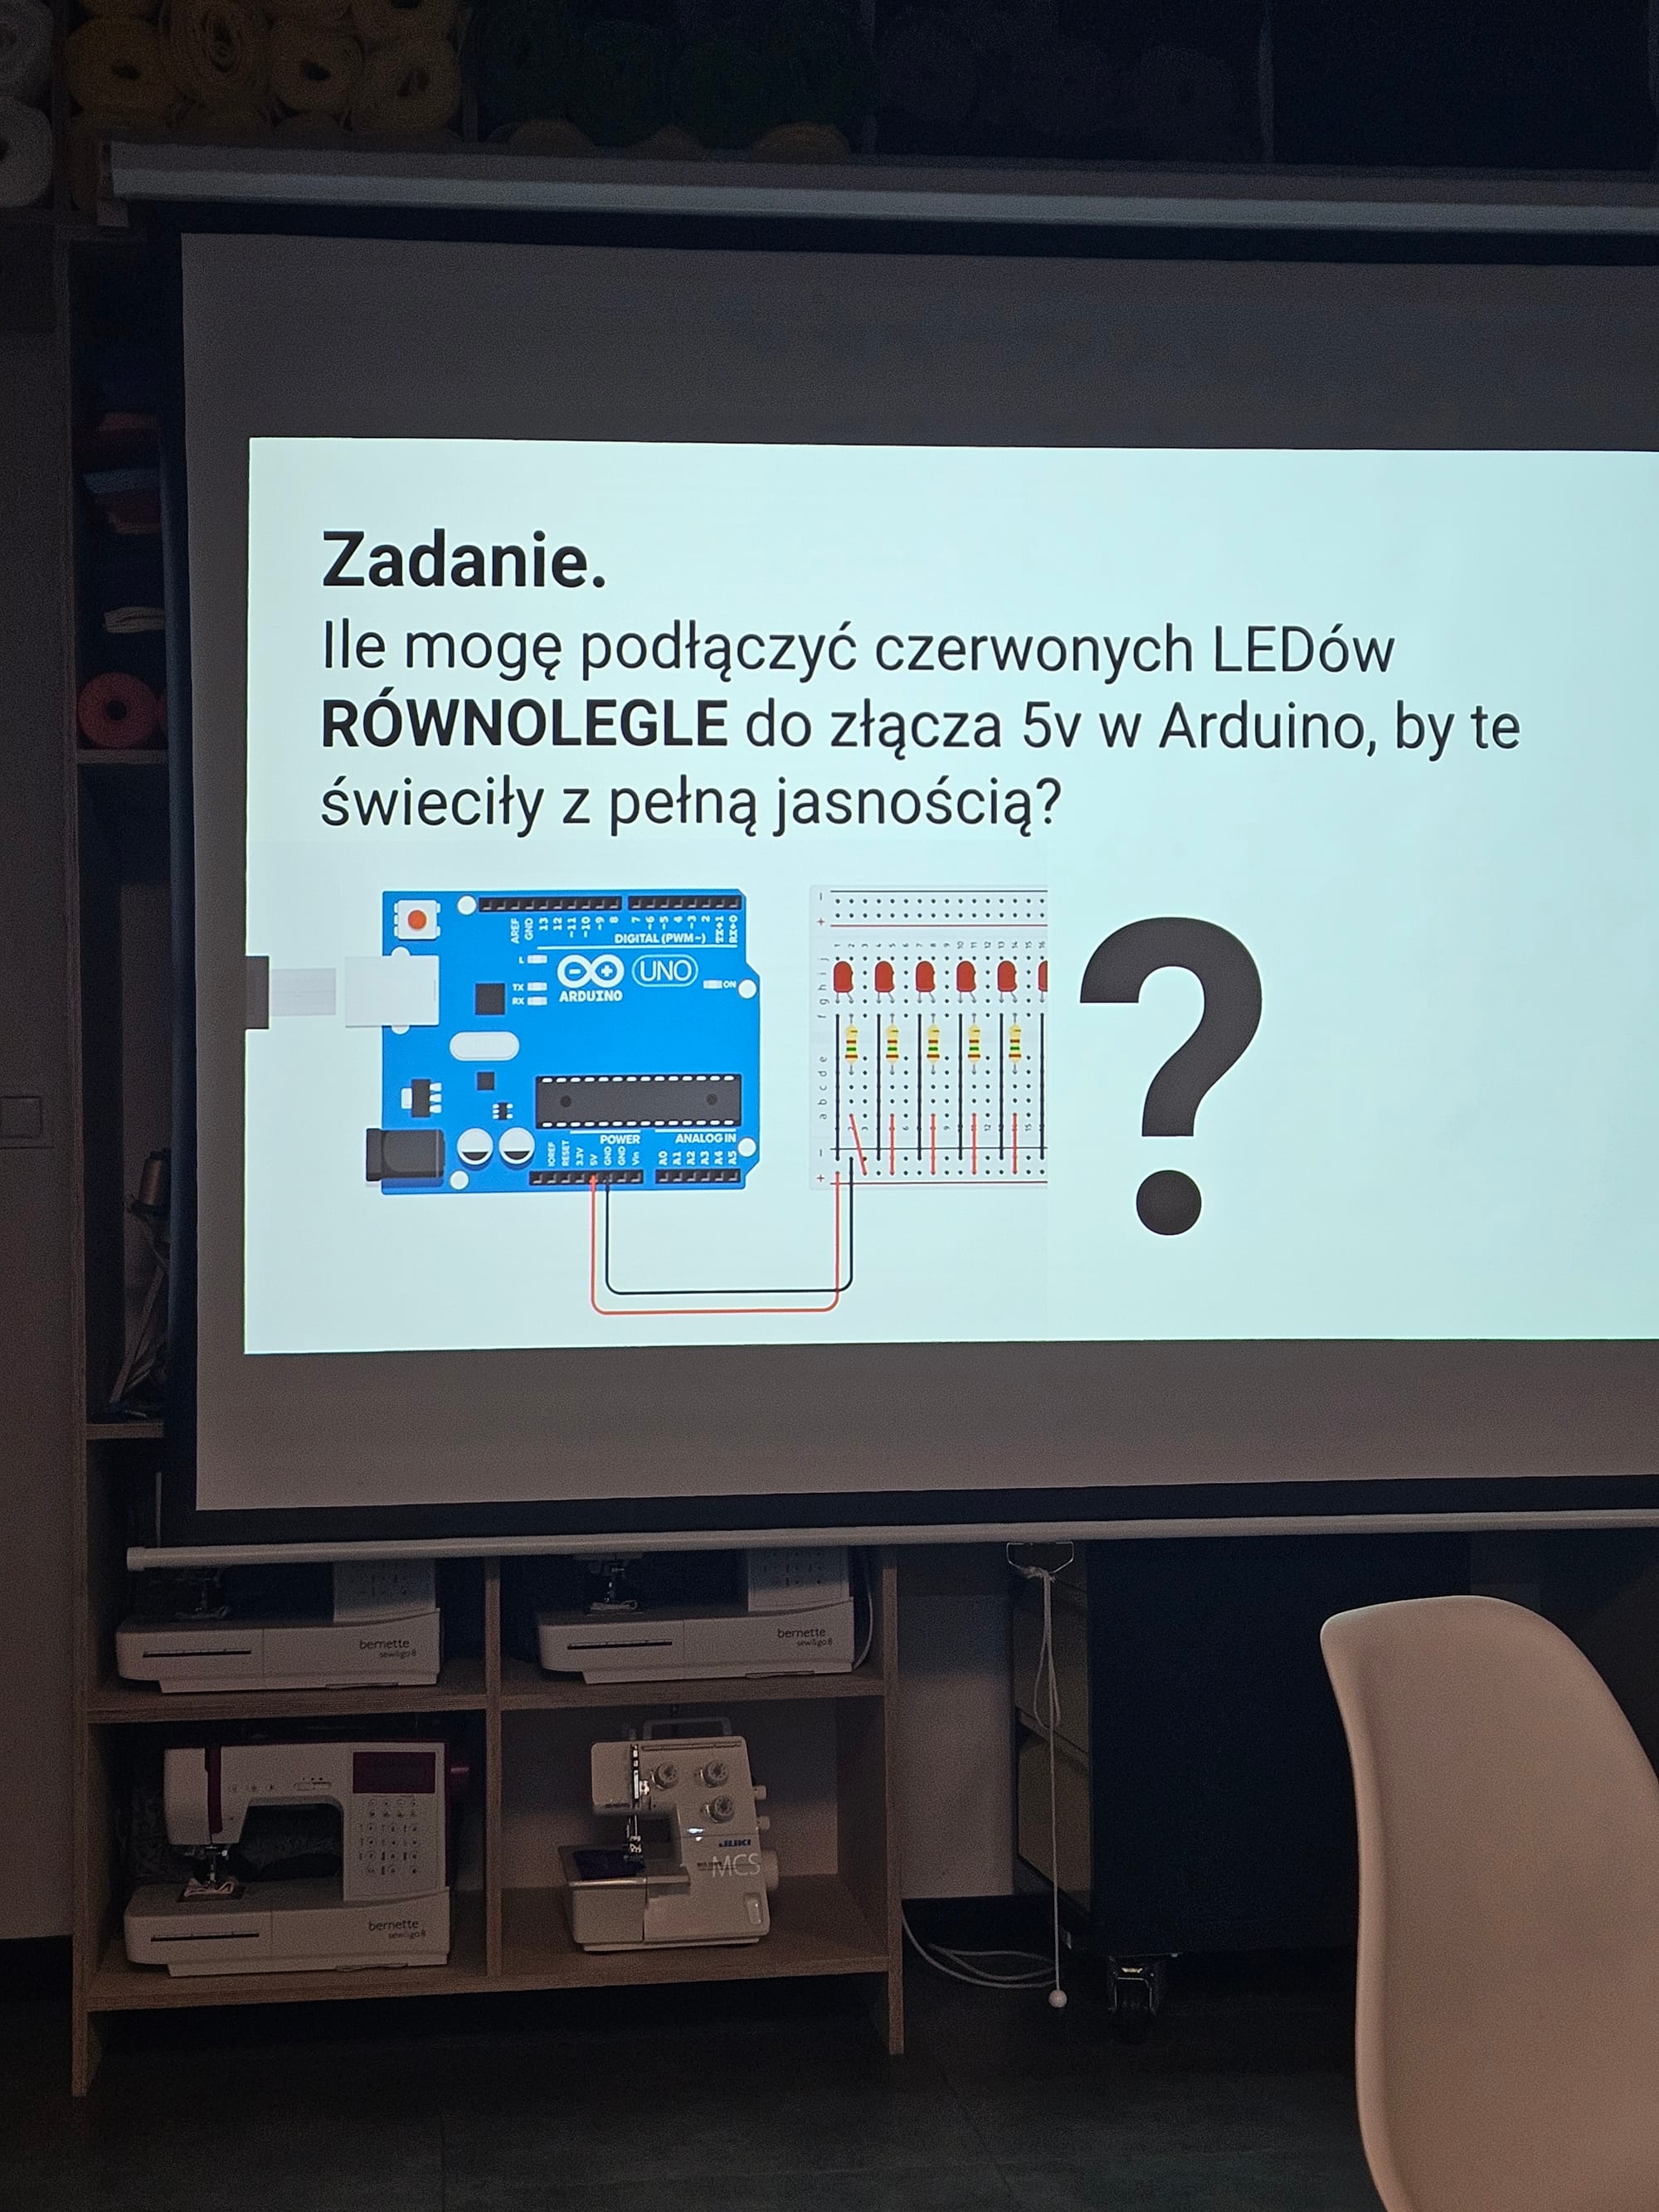
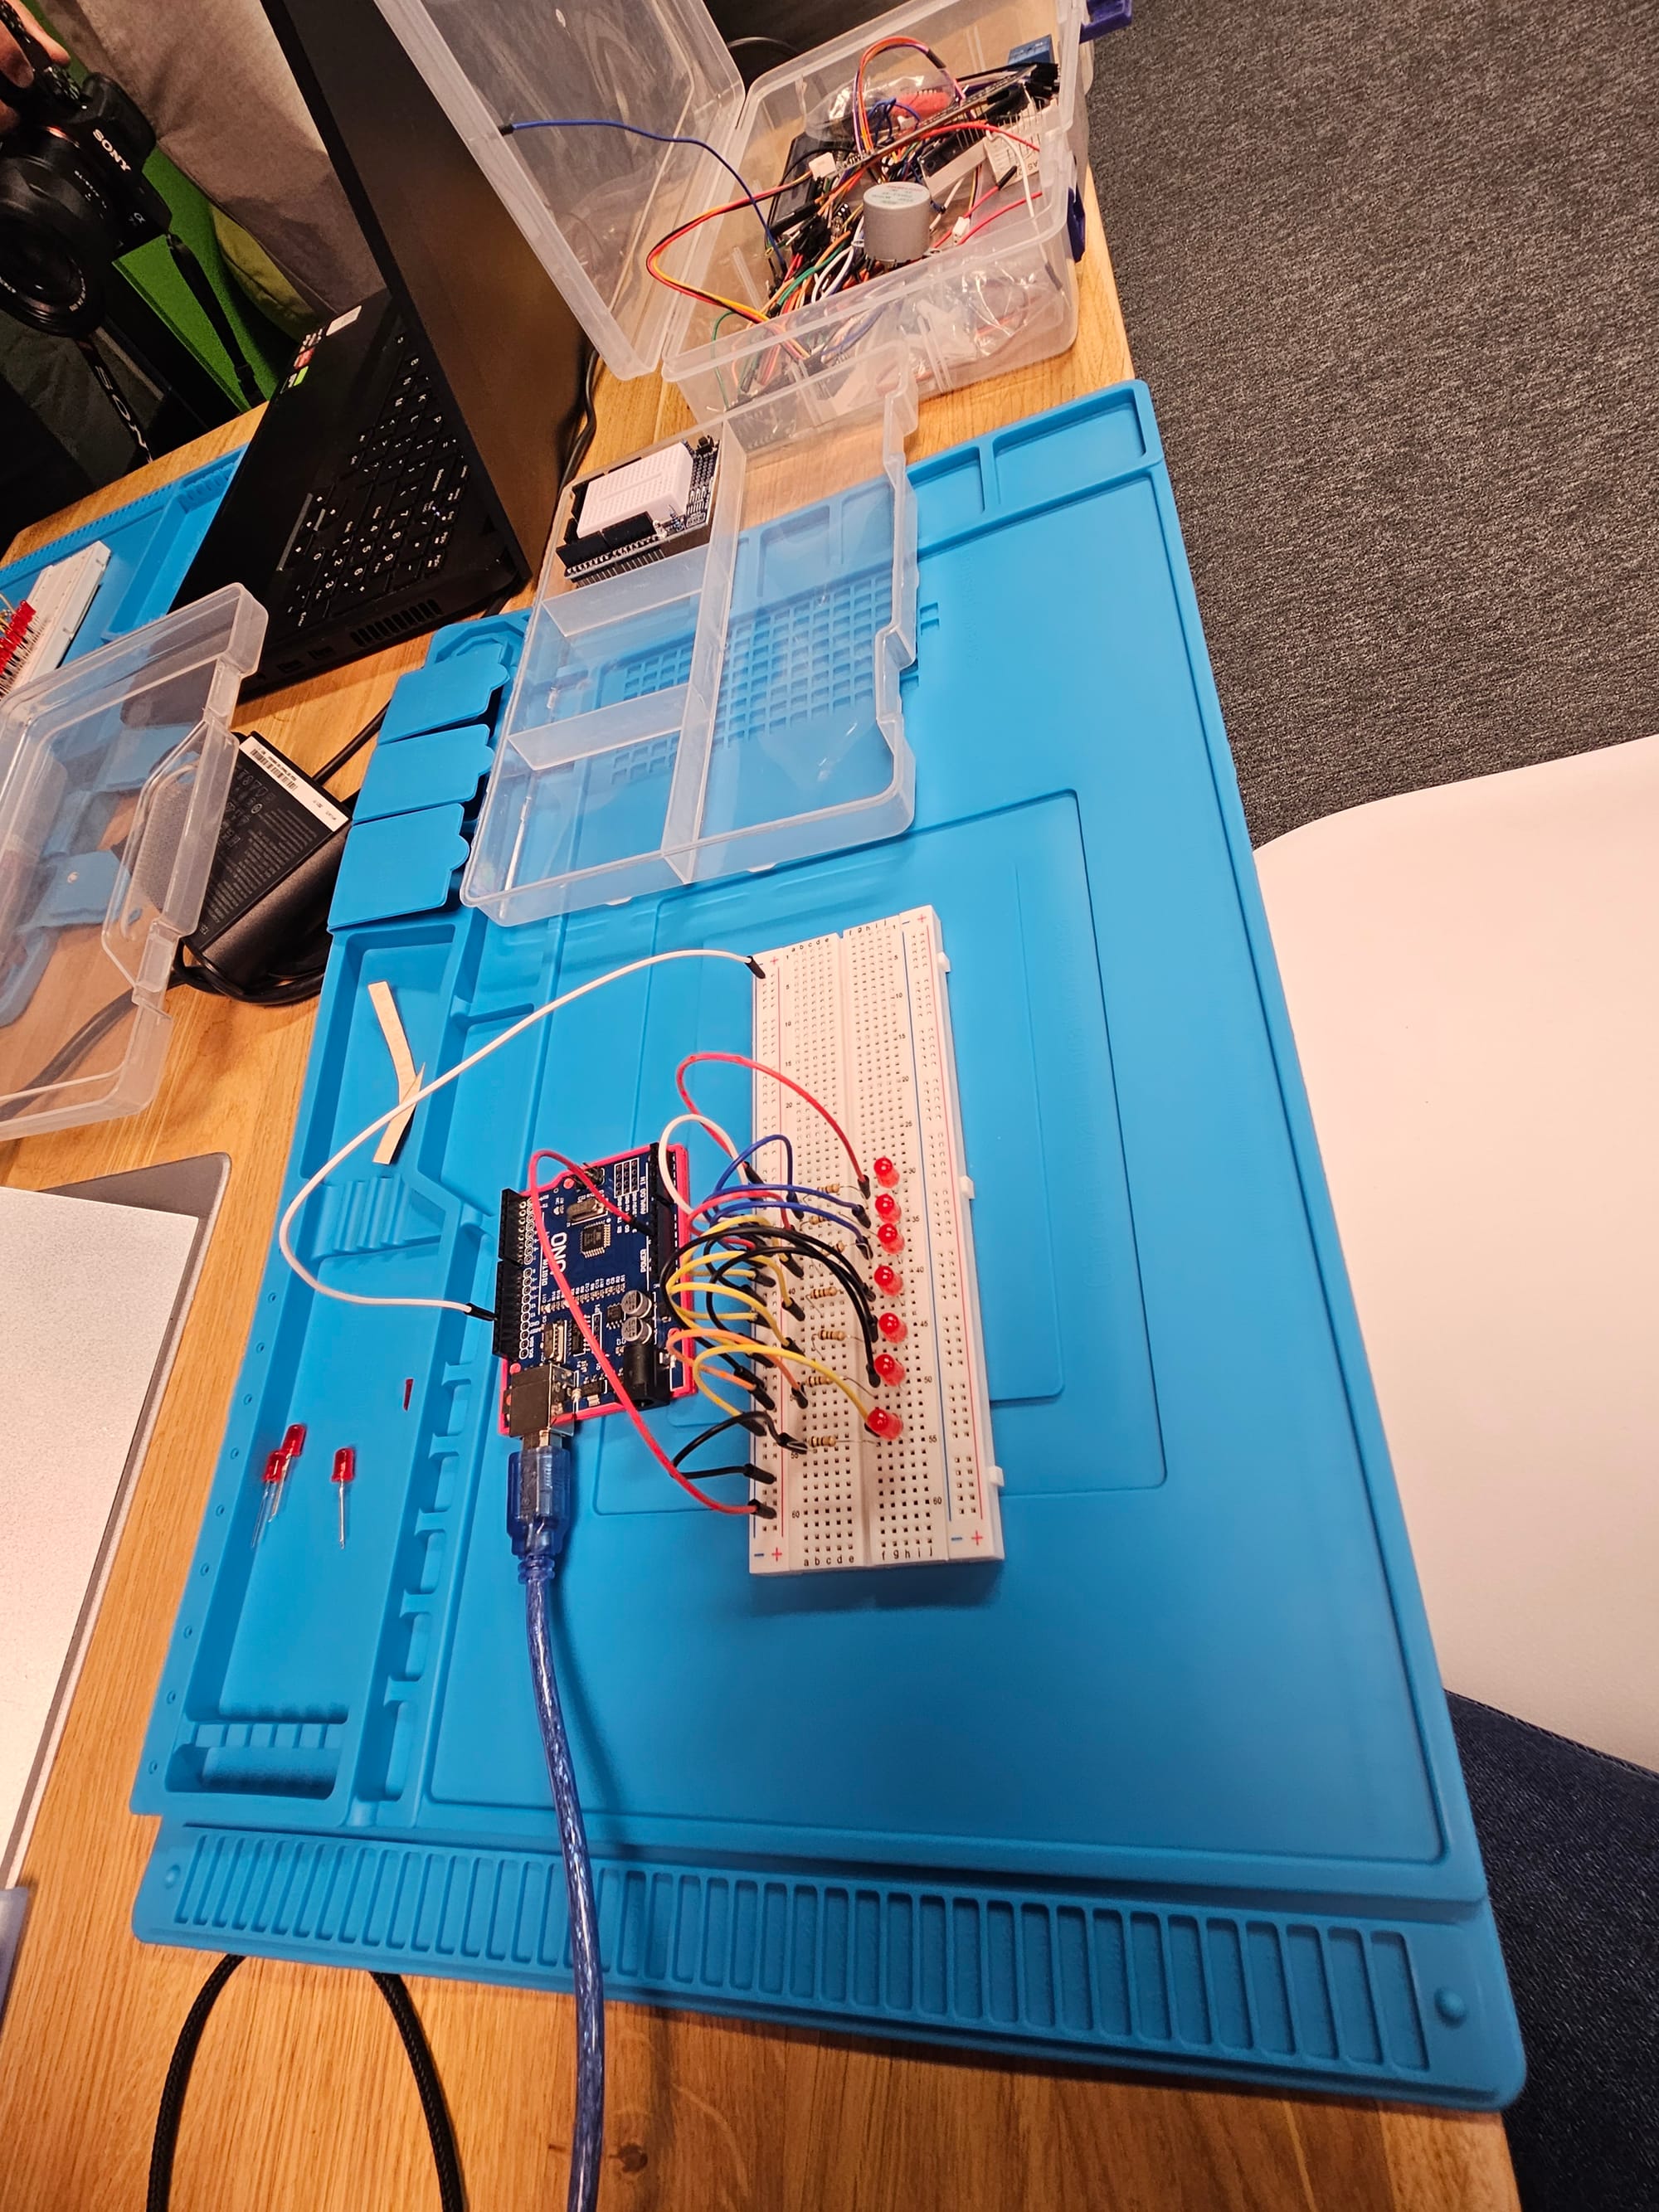
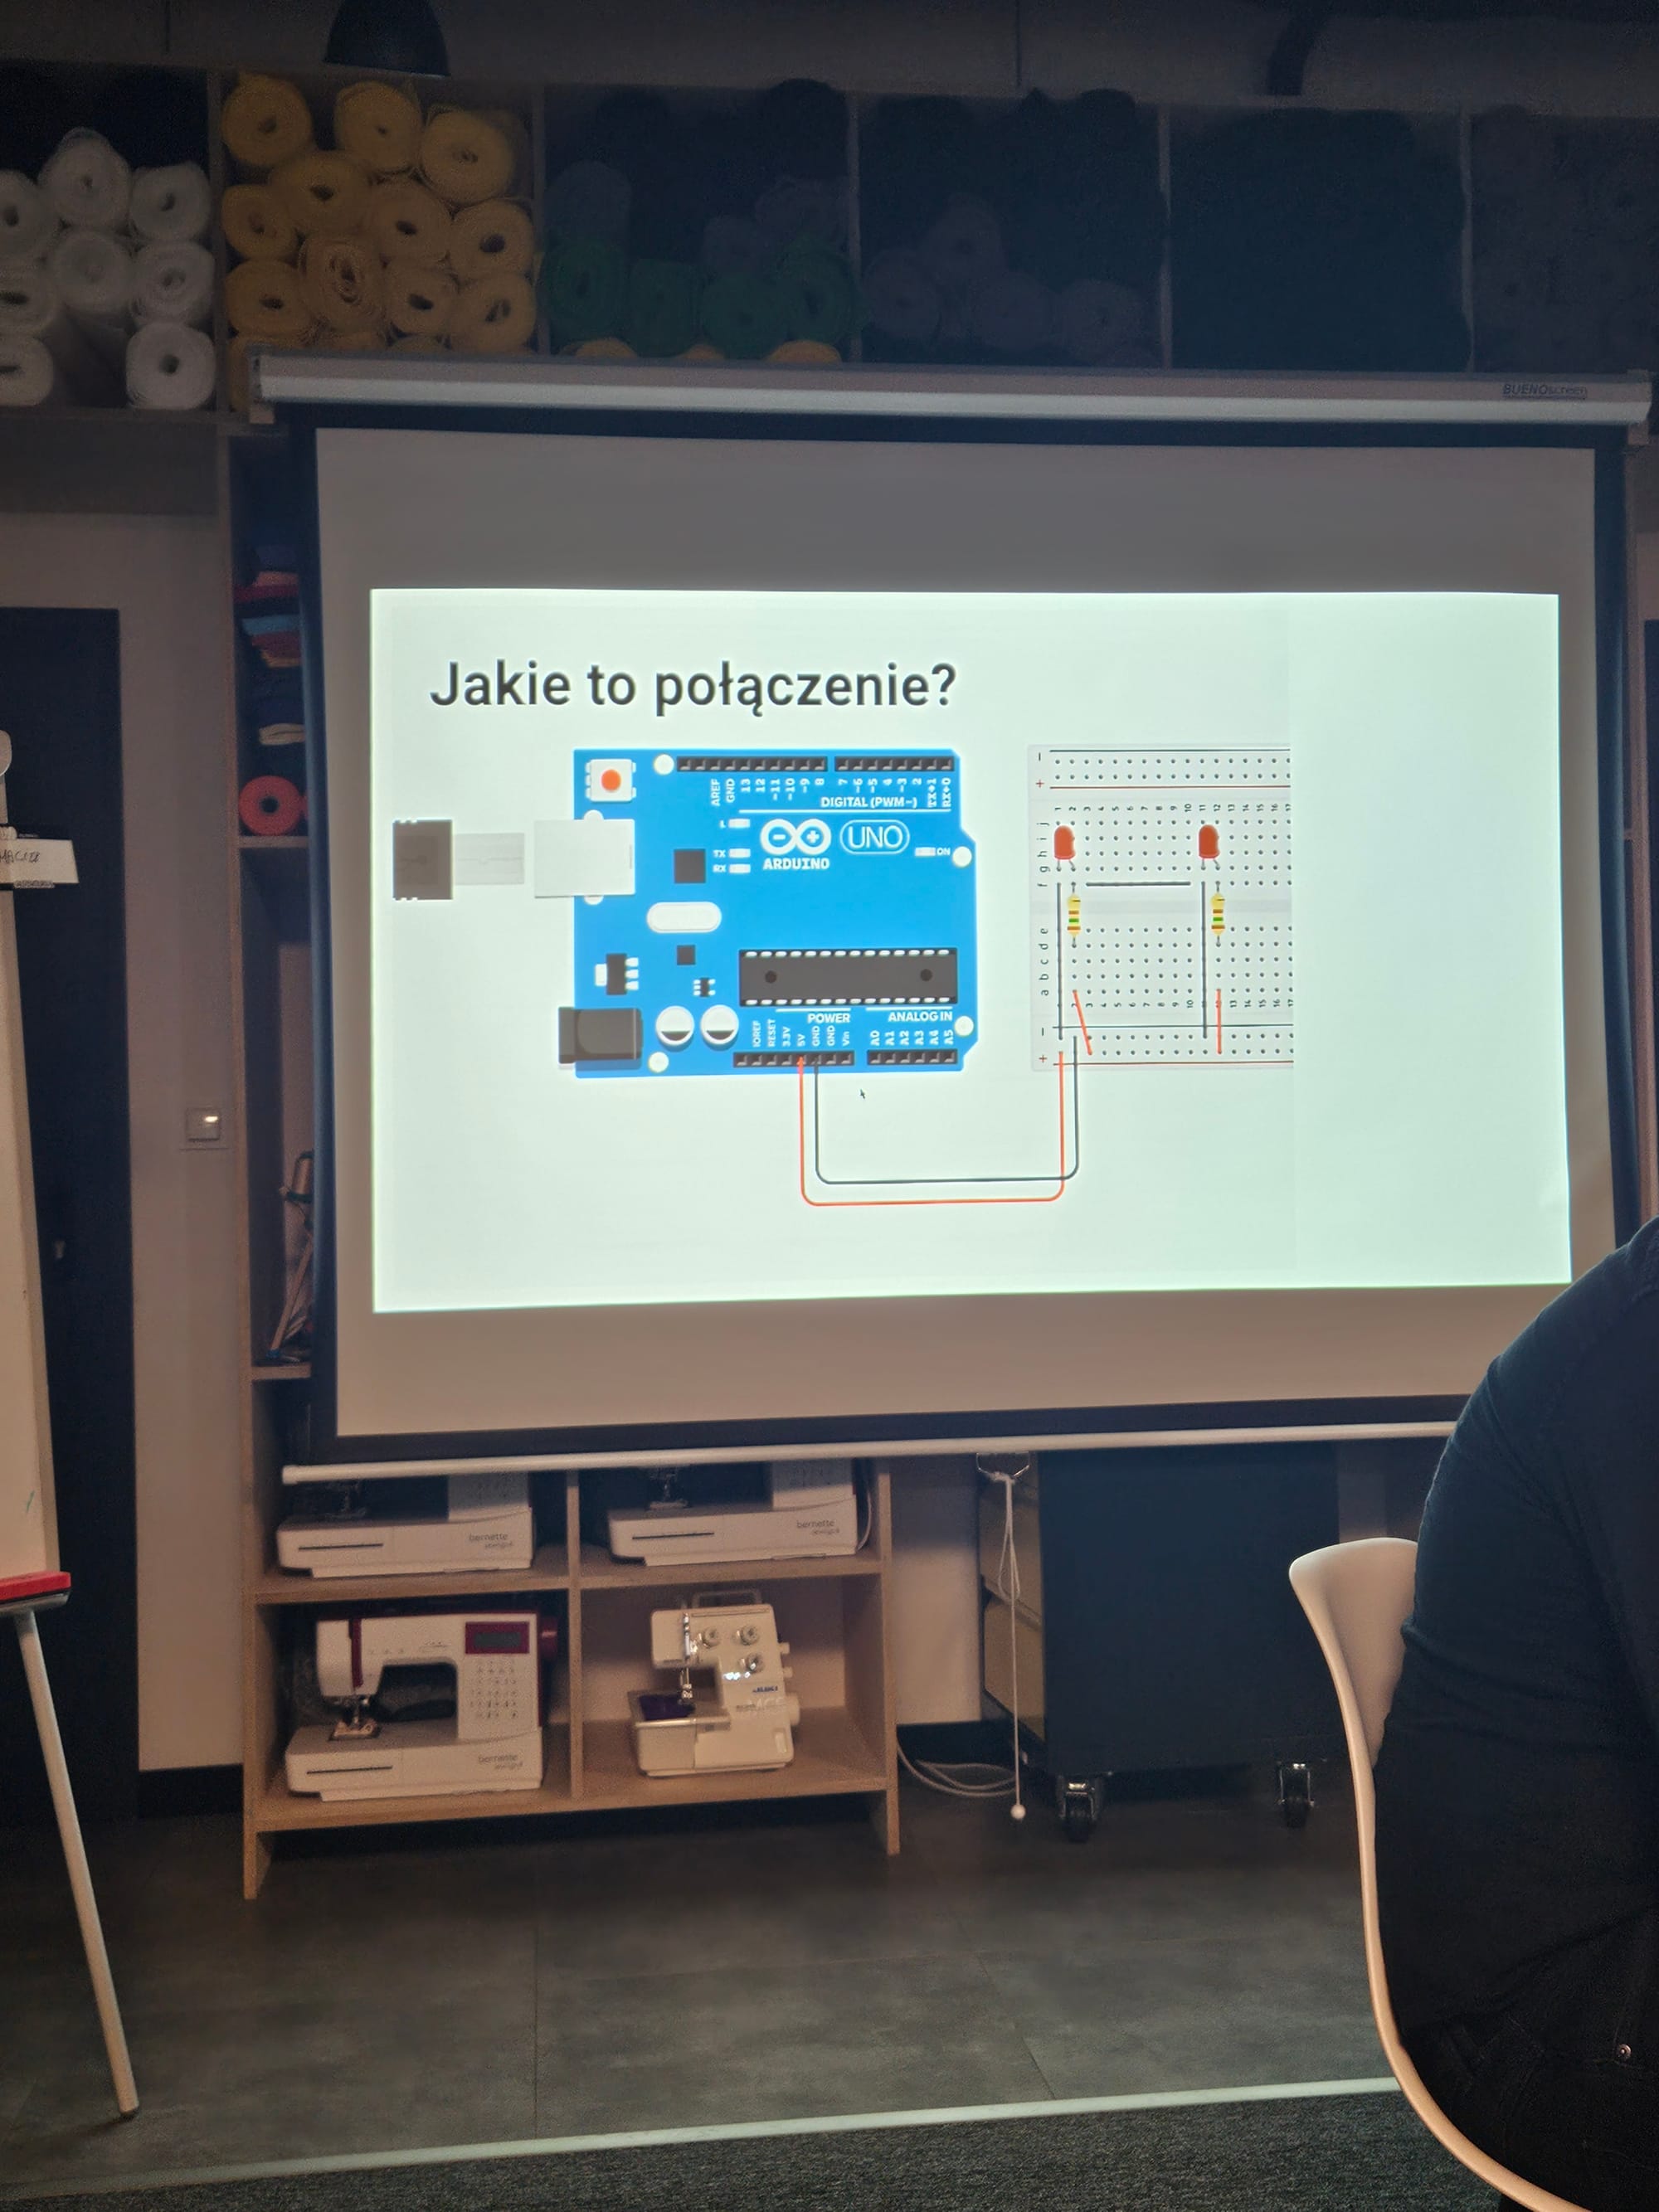
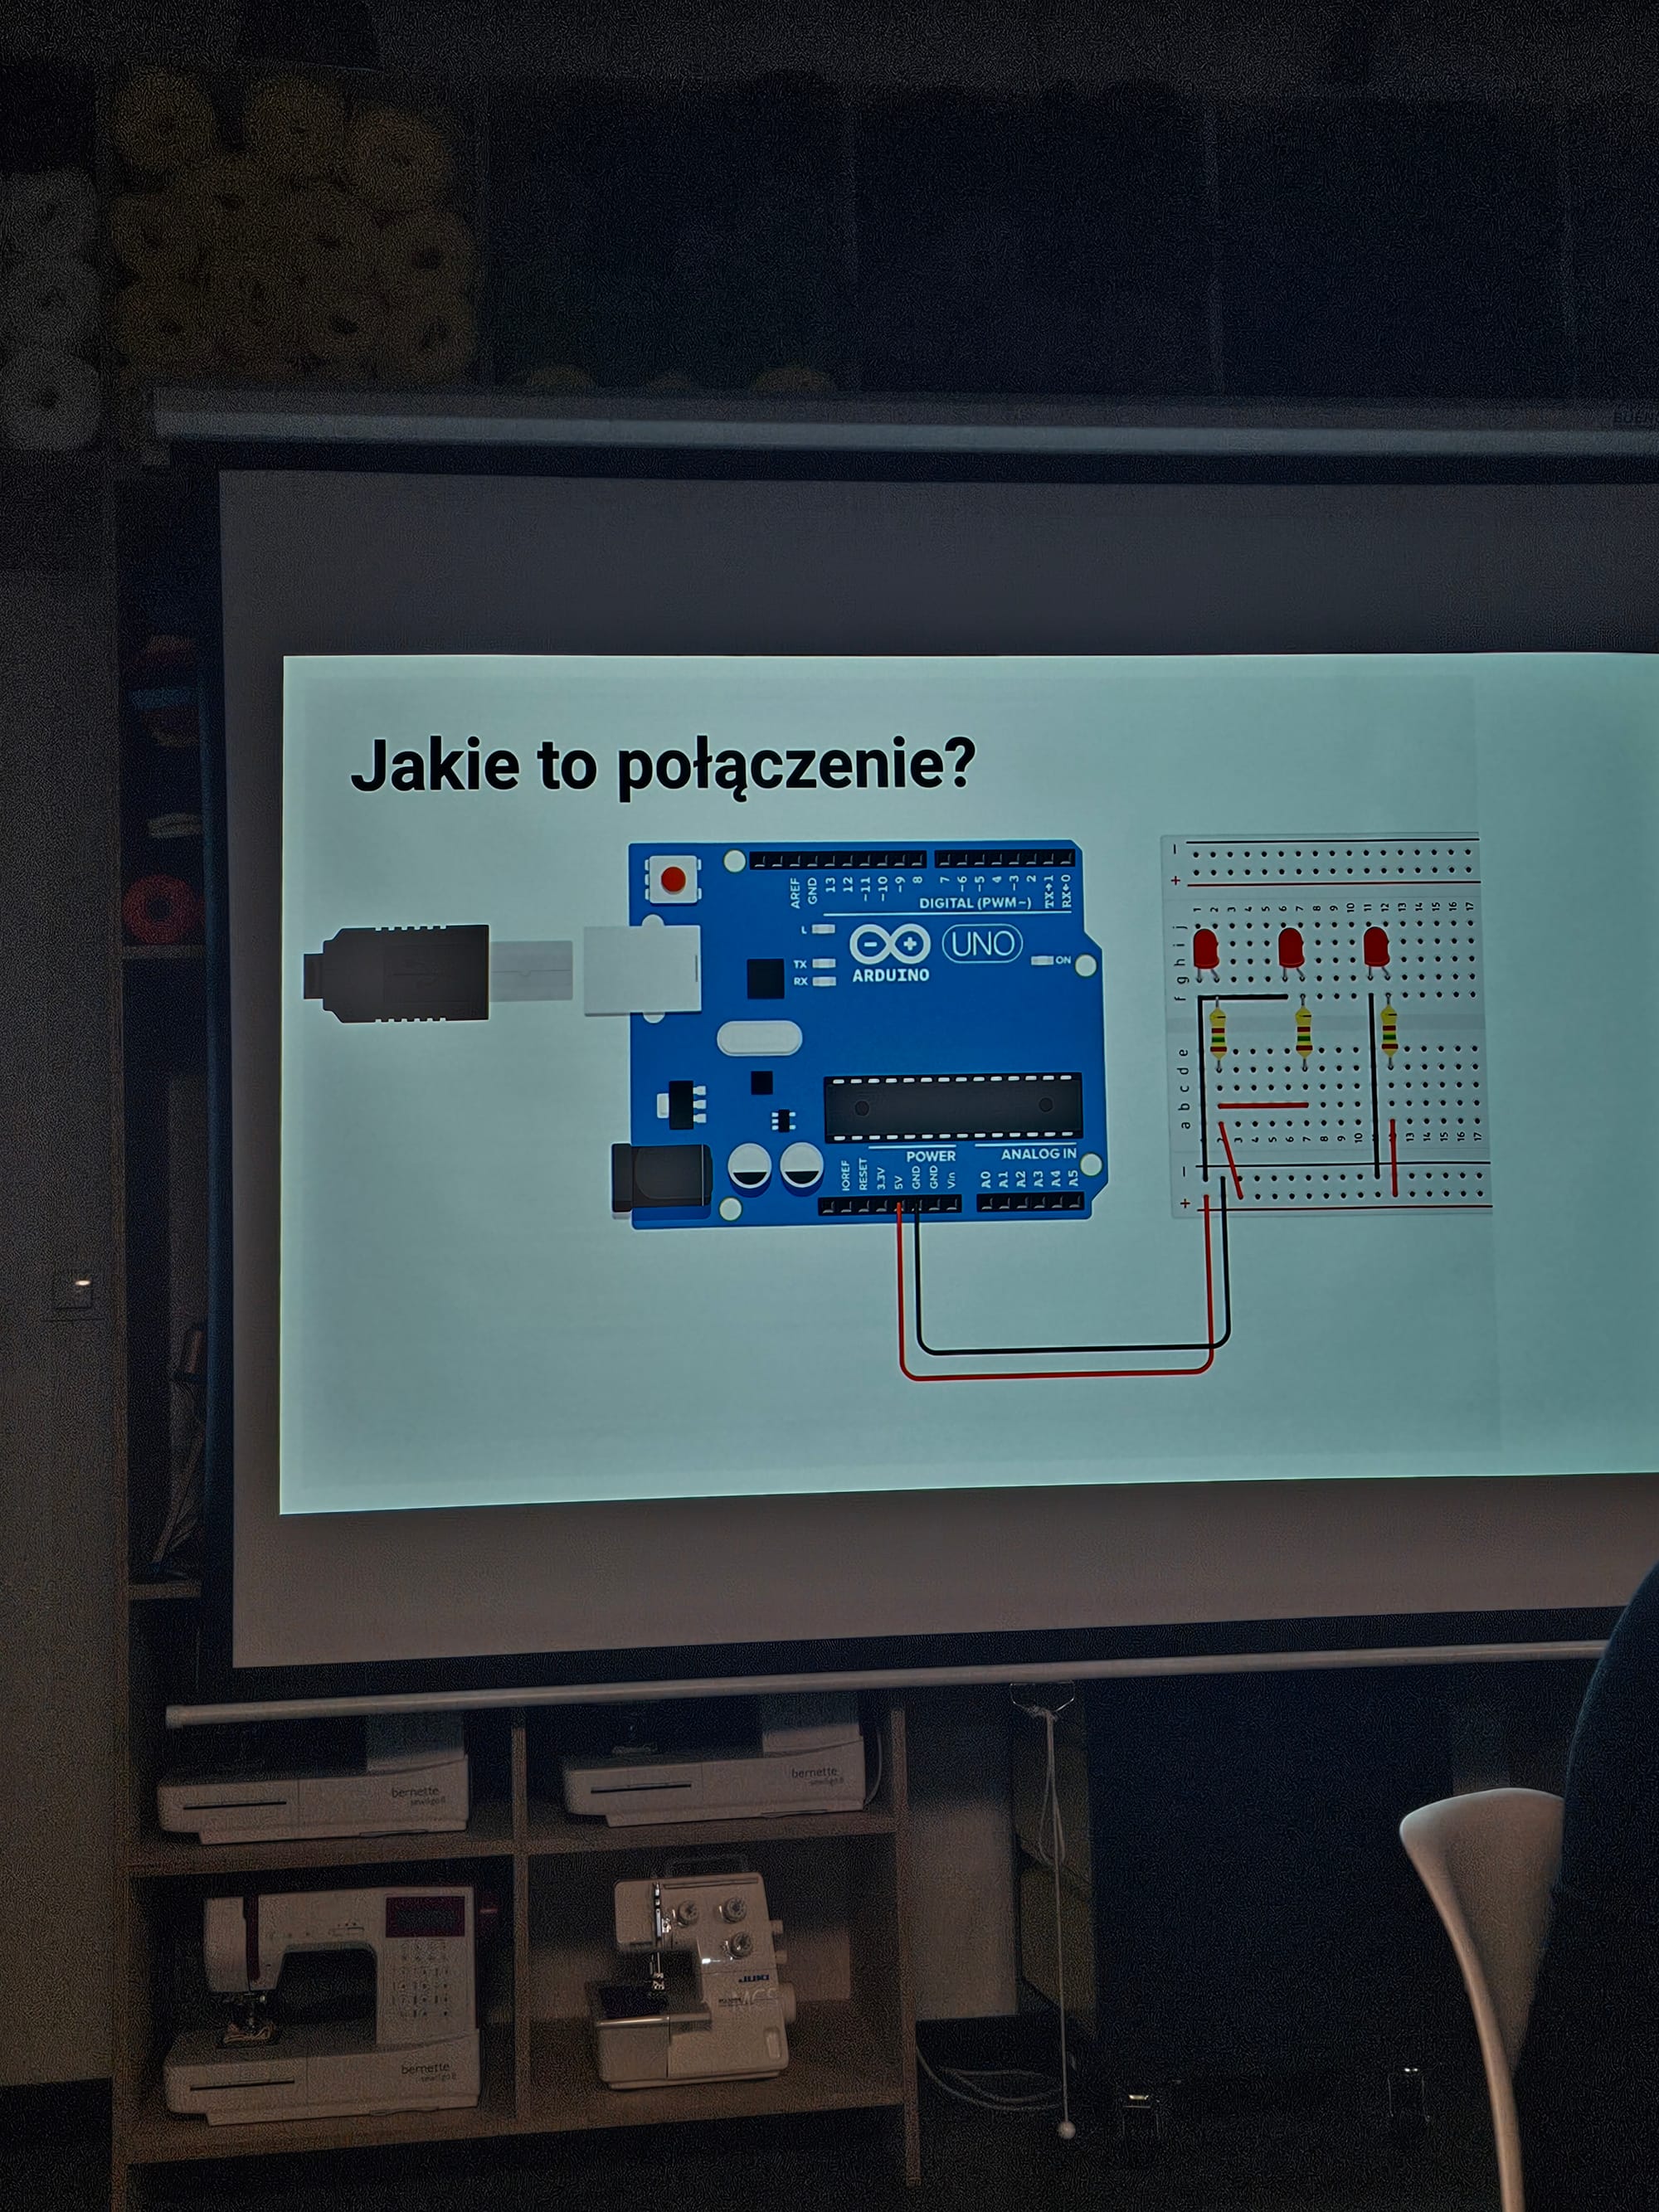
zadanie 1 - 250 mA - max prad z wyjscia i 5V, a jedna dioda = 20 mA, wynik = 250mA / 20mA =12,5 leda. Trzeba dodac rezystory, bo kazda jest przypieta na 5V
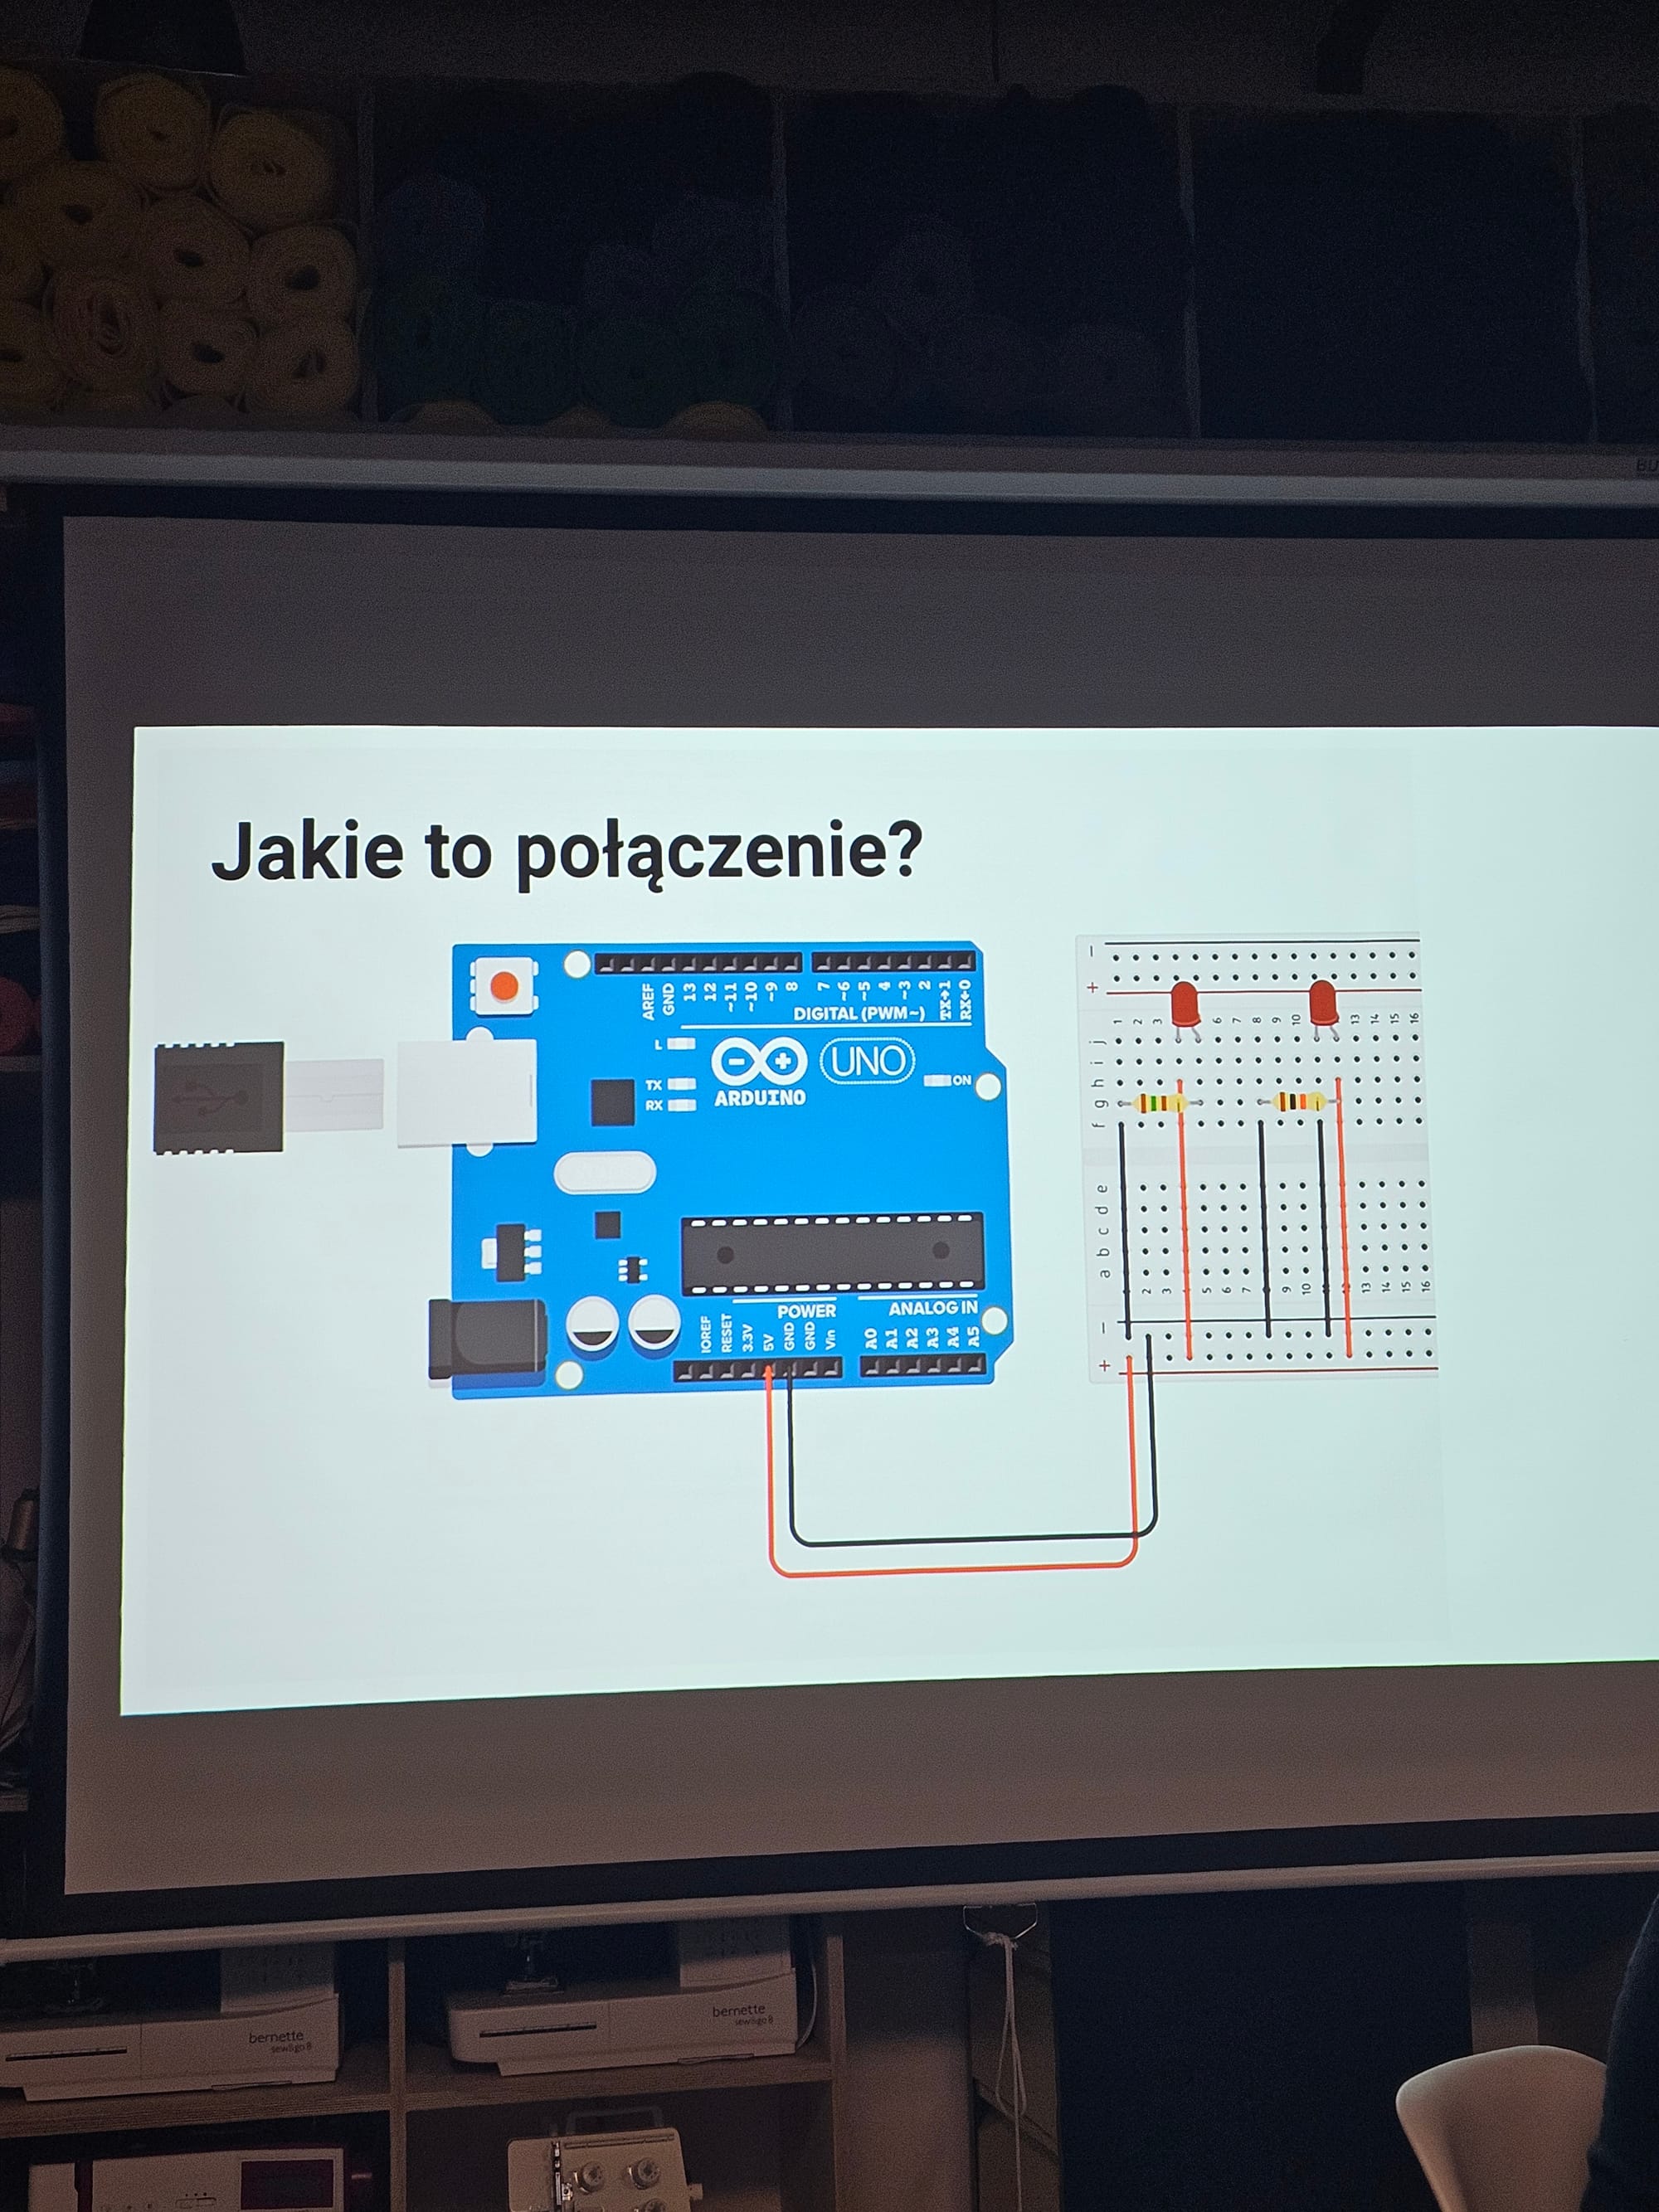
tinkercard - petla forever - high - czyli podajemy 5V i czekamy 1 s, zeby byc w stanie zobaczyc zapalenie diody, bo taktowanie 16 MHz, czyli bysmy nie byli w stanie tego zobaczyc bo swiecilby co 1/16 000 000 sekundy
- BuildIn -Led L na Arduino jest polaczony do gniazda nr 13
- skopiuj kod z Tinkercard i wklej do programu Arduino IDE
- wazne zeby wczytal sie port!
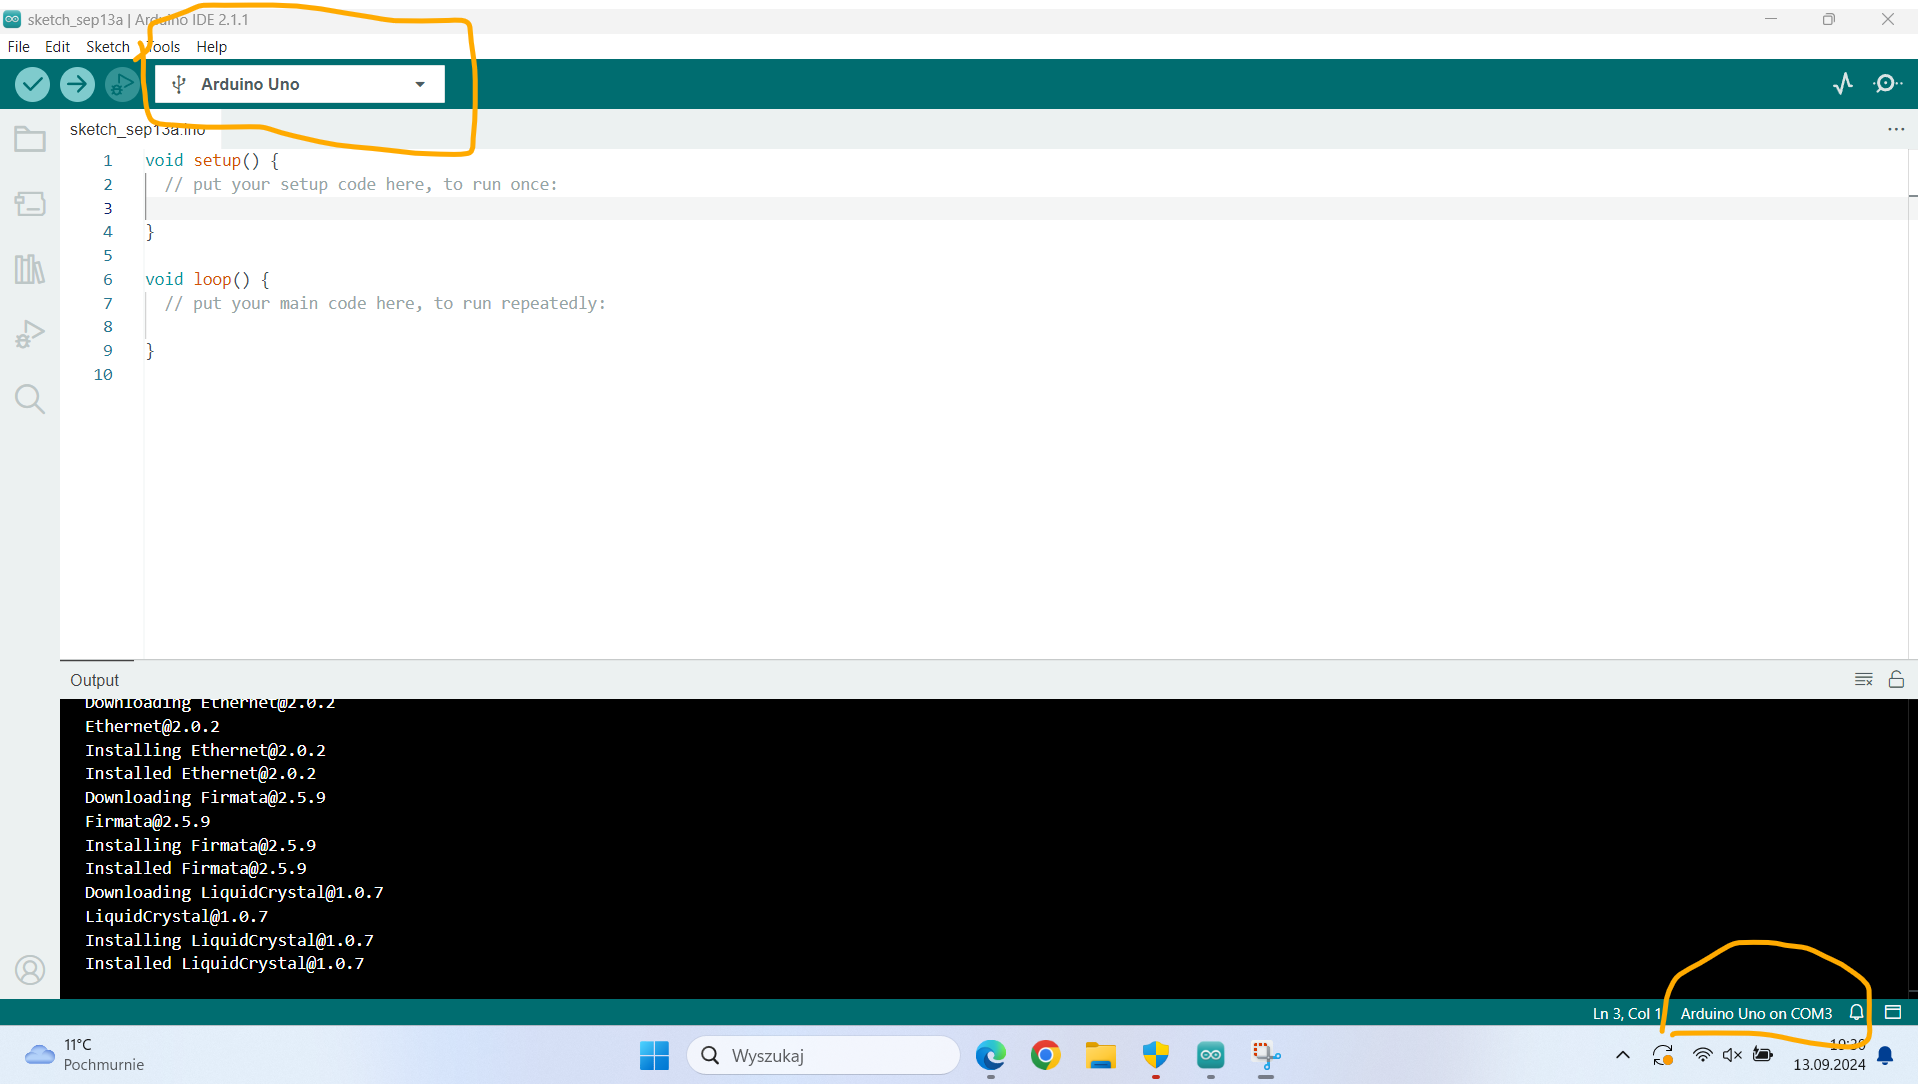
skopiowalismy kod z blokow Tinkercard i skompilowalismy w Arduino IDE
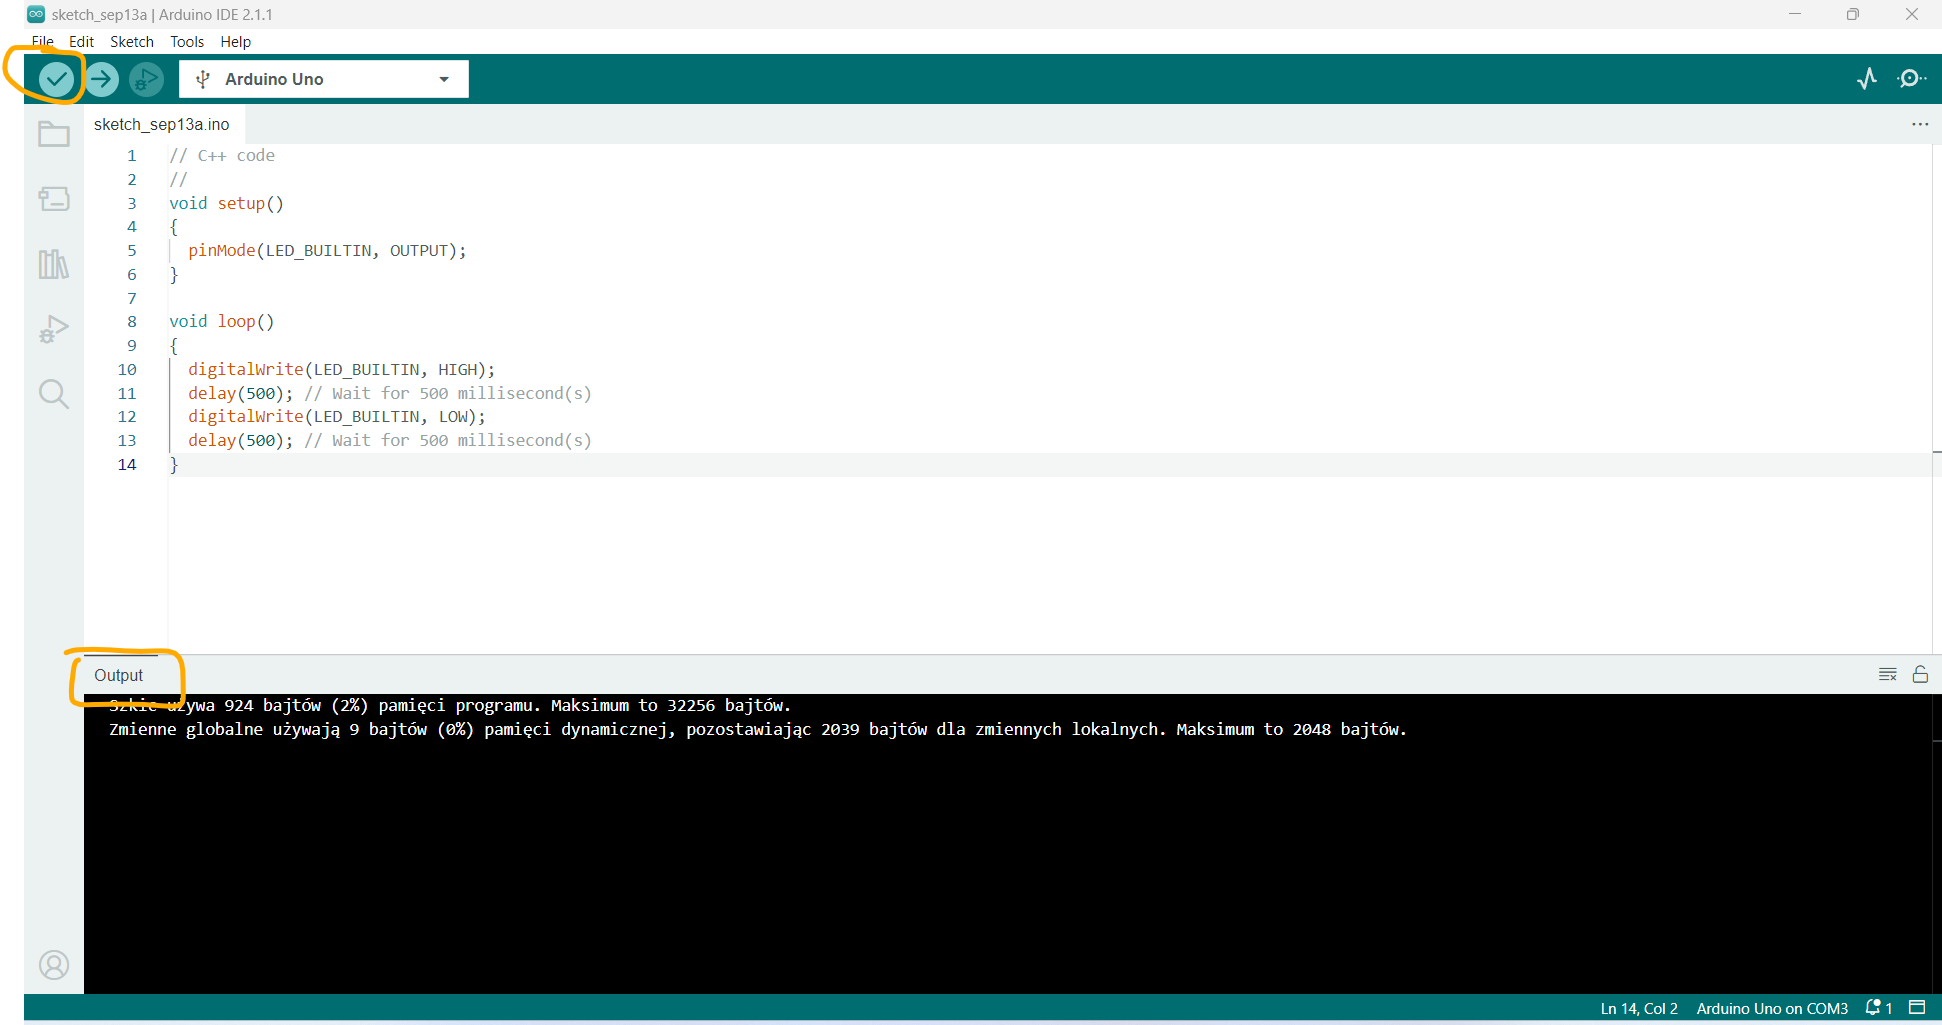

upload strzalka
- na arduino mamy 13 digital
- 9 - na wejscie nr 9

zad domowe
zbuduj sygnalizacje swietlna w tinkercard
Serial Begin(9600) Baud rate
a breakdown of the command:
Serial: This is the object in the Arduino environment that handles communication between the micro controller (the Arduino board) and the computer or external devices via the serial port (such as USB or Bluetooth)..begin(9600): Thebegin()function initializes the serial communication at a specified baud rate, which is the speed at which data is transmitted over the serial connection. The number9600represents the baud rate, which is 9600 bits per second (bps). This means that data will be sent and received at 9600 bits per second.


